WALKTHROUGH

[Game Info | Fighters | Codes and Secrets | Walkthrough]

[Allied Airport | Swampland | Boss "VIOLET HEAD" | Beach Landing | Bomber Squadron | Boss "SAND LOBSTER" | Final Boss]


STAGE 1 - Allied Airport Stage
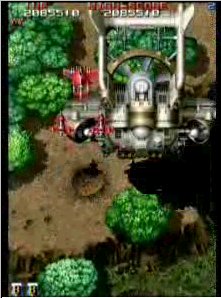
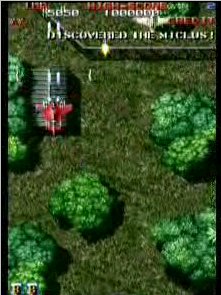
BOSS NAME: (Unknown)

Turbine-Driven Aircraft Thingamajig

Stage Secrets & Boss Strategies

Miclus: 3

Fairy: 1

This stage is quite short, and not too challenging. Its setting is over a military airport belonging to the good guys, which is under siege by the enemy. You'll see a cameo appearance of the Endeavor from first Raiden Fighters; there is a couple of them in port on the right side below some Aegis II-c fighters. When you encounter this stage as your second stage, an Aegis II-c fighter will accompany you (two if in a two-player game).

It is possible to build up to the 100K-point medals in this stage. It is quite easy to do once you know where and when every enemy appears in this stage. I've done it numerous times with the Raiden mk-II. You must begin this stage first do to this feat. To do this, after inserting a coin, hold UP or DOWN on the joystick while pressing the START button.

The strange-looking boss in this stage is hard to describe. It looks like a hybrid of a hovercraft, a helicopter, and an airplane! This amalgamation of different types of craft is easy to contend with, save a couple of fast attacks in its second attack phase.

Come to think of it, ALL of the bosses in Raiden Fighters 2 are disappointingly easy. Many of their attacks are watered-down versions of attacks by bosses in the first Raiden Fighters, with a couple of fast attacks thrown in to catch players off-guard. Only the true final boss, Red Eye, is insanely hard. Red Eye is even harder in its reappearance in Raiden Fighters Jet, LEVEL 50!

Miclus: Hover over the lower portion of the green building on the far left side of the screen near the beginning of the stage. A Miclus will appear.

Hover over the Miclus while shooting him to collect the medals the Miclus spits out one at a time. This will increase the medal's value. You should now have 90-point silver medals. Shortly thereafter, a large green bomber appears. Destroy it and get the Slave Icon [S].

Now begin building up the blue medal's value. Destroy all the fighters that appear. One of them is blue in color. Destroy it and get a blue medal (100 points). Then, a medium-sized heliplane appears. Destroy it and get the 2 blue medals (200 points each). Next,  two tanks appear at the upper part of the screen. Quickly destroy them and get the blue medal that appears (300 points). Then, six tanks appear, three of which carry a medal. Destroy two at a time and get the blue medal that appears. (400, 500, 600 points). Next, two tanks appear on the right side destroying the friendly aircraft on the ground. Destroy ONLY the bottom one. Leave the heavier one on the top alone. Now, immediately go to the left side of the screen. Destroy the tank over there on the left side and get the blue medal (700 points). Go back to the right side. You'll see another light tank below the aforementioned heavier tank. Destroy only that light tank. Get the blue medal (800 points).

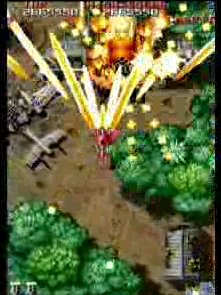
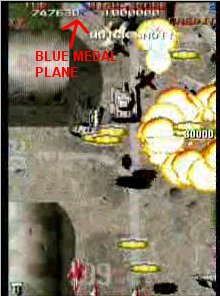
Now begin building up the green medals' values. A large green bomber appears. Destroy it and pick up the Slave Icon. A small truck on the left will travel across the screen and collide with the heavier tank that you left alone on the right. Both the truck and the tank will explode. After this a Miclus will appear from the large white plane on the ground above the collision. Overlap the Miclus and shoot it to get the green medals on at a time. You now should have 9000 point medals.

Miclus: Before the second large green bomber appears, look for two tanks on the right side, a smaller tank on the bottom and a heavier one on the top. Destroy the smaller tank and leave the heavier tank alone.  A small truck on the left will travel across the screen and collide with the heavier tank that you left alone on the right. Both the truck and the tank will explode. After this, a Miclus will appear from the large white plane on the ground above the collision.


At this point you will initiate the 100,000 point medal mode. While doing this, DO NOT collect any of the gold 10,000 point medals you see! You must get 9 of the 10,000 point gold medals to appear on the screen at one time. When this happens, they will all explode, signaling to you that you are in 100,000 point medal mode. First, a heliplane appears. Destroy it and it releases 2 gold medals. Destroy the small blue plane that appears, and one more medal appears (3 total on screen). Another heliplane appears. Destroy it. 2 gold medals released (5 total). Yet another heliplane appears. Destroy it. 2 more gold medals released (7 total). Now go to the bottom of the screen immediately. Two small blue planes appear. Destroy the first one with your regular weaponry and the second one with a Bomb. 2 more medals released (9 total on screen). Now there are 9 gold medals on the screen, all of which will explode at once! You can now build up to the 100,000 point gold medals.


Immediately release another bomb right after releasing the first one. The two bombs are used to protect the 3 small friendly tanks from the huge enemy tank's* shots. The first bomb cancels the first shot from the huge enemy tank. The second bomb cancels the second and third shots. You'll see the message "Defended the Tanks" on the top of the screen and a Miclus will appear. Overlap and shoot the Miclus and get the medals one at a time. You should now have 100,000 point medals!

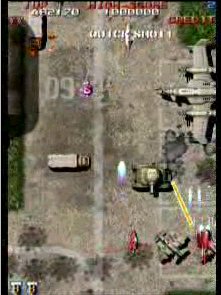
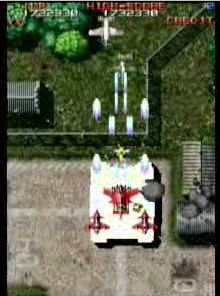
TANK x 3: Defend the three small friendly white tanks that the Huge Enemy Tank shoots at from its shots. If you defend all three tanks, a Miclus will appear from the huge white plane on the ground to the right of the Huge Enemy Tank! You can accomplish this by throwing two bombs to absorb the Huge Enemy Tank's shots. Oddly enough, your bombs don't hurt the small tanks, or anything else but the enemies for that matter. (100,000 points each)

Miclus: Defend the three small friendly tanks from the huge enemy tank's shots. You MUST NOT destroy the huge enemy tank while protecting the 3 smaller ones. If you defend all three tanks, a Miclus will appear from the huge white plane on the ground to the right of the Huge Enemy Tank!


Fairy: Destroy the huge enemy tank's turret and leave the tank body alone. When it can no longer retreat, a Fairy will pop out of the tank.

Aegis II-c Assistance: You will receive 100,000 points for every Aegis II-c that remains after you pass the Huge Enemy Tank.
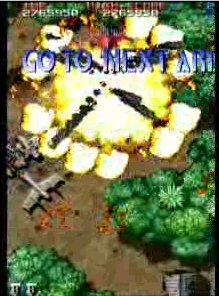


The Boss:

  • You can get 2 "Destroyed at a time" bonuses by going point blank and killing the two sets of guns it drawn out.

  • The boss will cycle from two attack patterns: one is an aiming spread shot coupled with two side vulcans, another is a spread shot.

  • If you are having trouble with this boss move in a left/right formation. This will make it harder for the boss to trap you in between the side vulcans and the spread shot.

  • Many bosses in RF2 have relatively few hit points. The boss will die if you tickle him enough.

GO TO NEXT AREA


[Game Info | Fighters | Codes and Secrets | Walkthrough]

[Allied Airport | Swampland | Boss "VIOLET HEAD" | Beach Landing | Bomber Squadron | Boss "SAND LOBSTER" | Final Boss]

Back to Front Page